Setup Of My First Blog - Github Pages and CloudFlare
- 1 minAs you might have recognized already, this website/blog is using a Jekyll template and is based on github.pages.io. The advantages of using Jekyll are:
- fast and easy setup
- free hosting on githubpages.io
- easy to add a custom domain with SSL via CloudFlare
In particular, this website is using a Jekyll template called Indigo which is made by Sergio Kopplin. You can find it here. Credits to him for this minimalist masterpiece.
Github Configuration
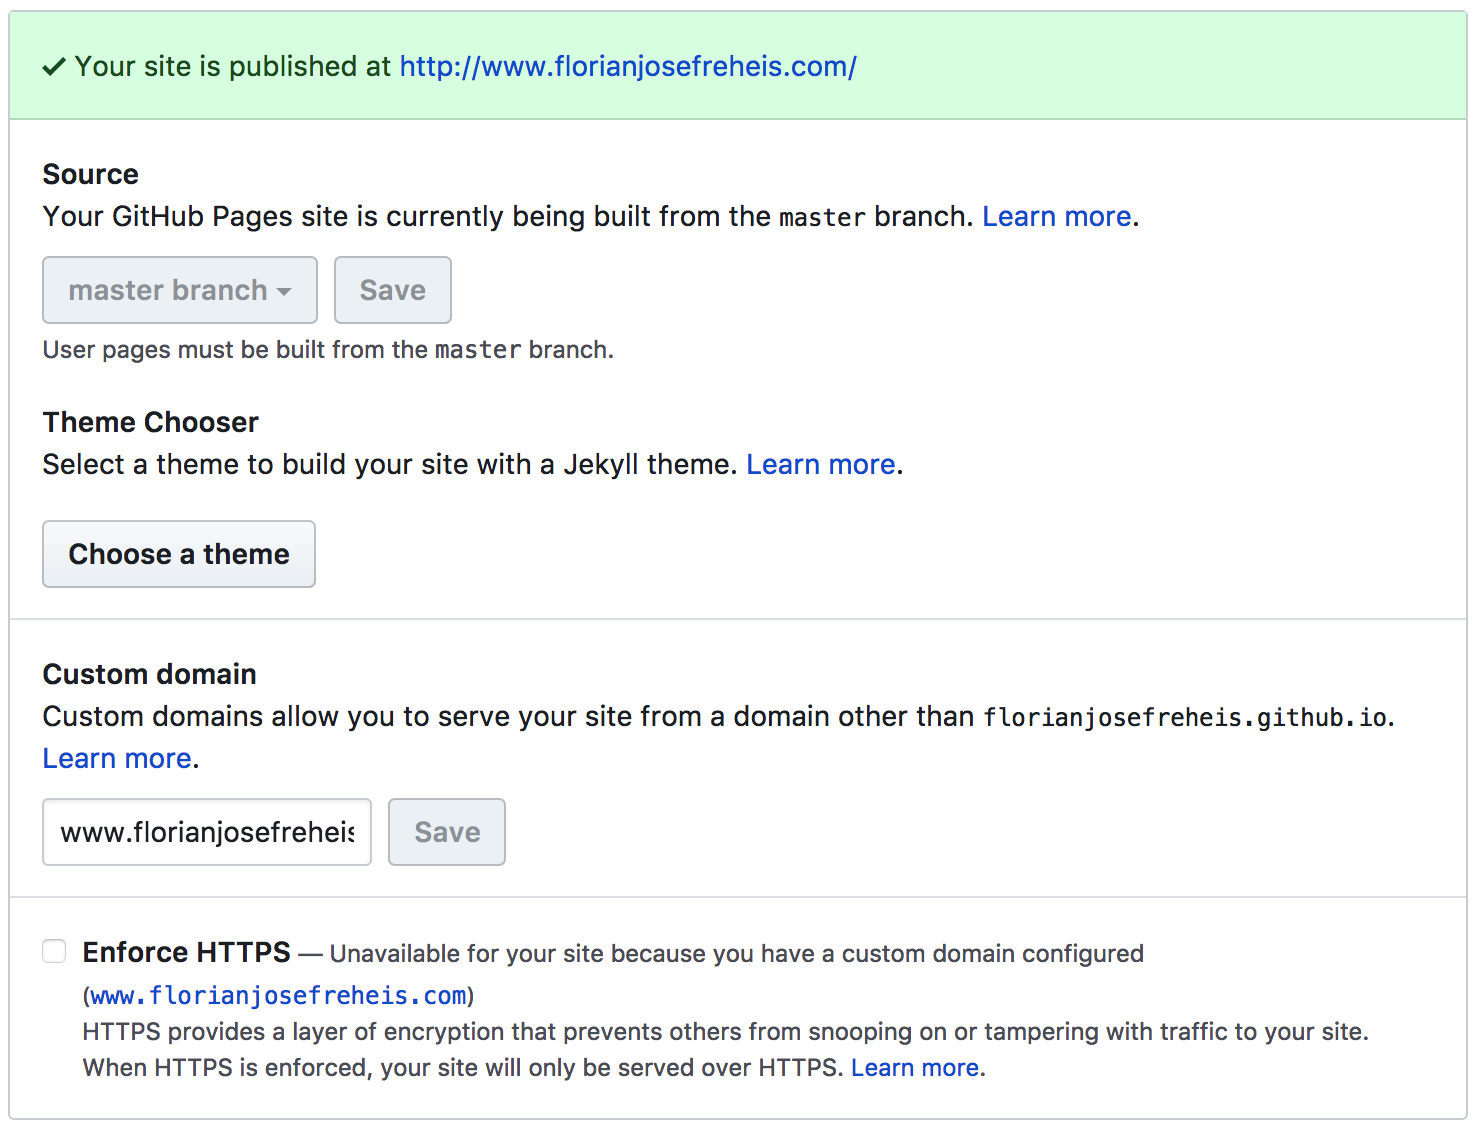
After installing the template and adding small tweaks, the website was up and running. Next step was to add a custom domain to the Github repository. On the Settings page we need to check if the repository uses a custom domain name and doesn’t use HTTPs:
CloudFlare Configuration
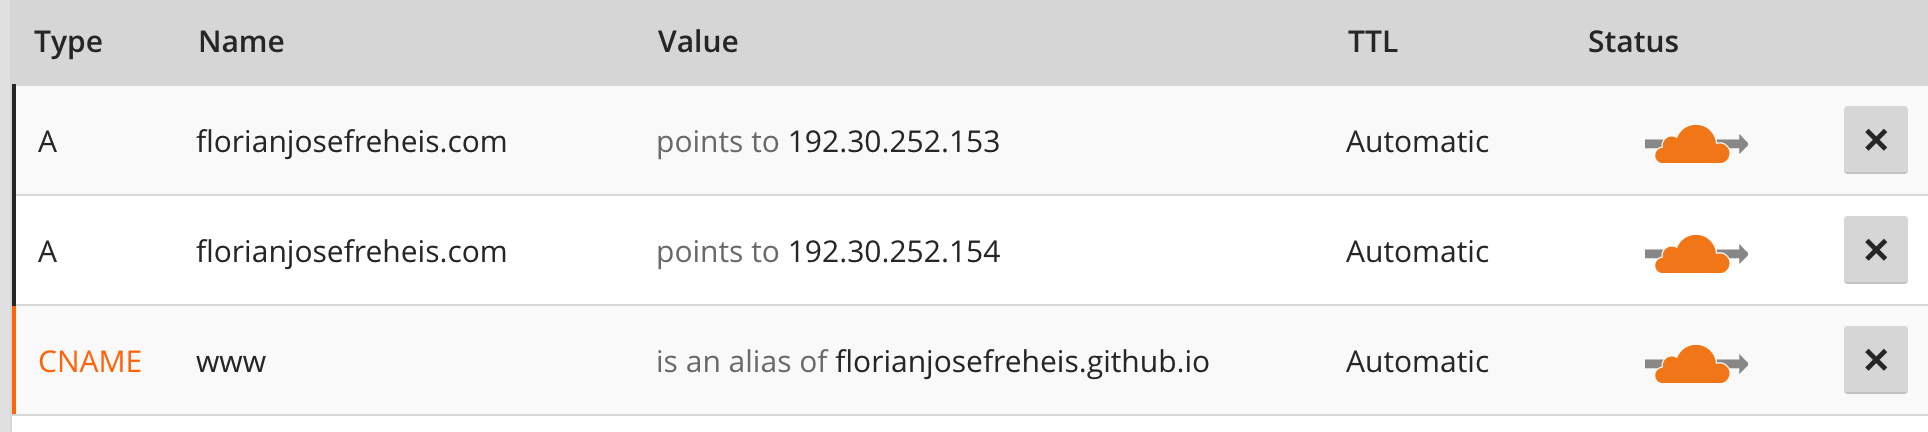
After clicking on the DNS tab we can add a custom domain name to use CloudFlare DNS instead of your current ones. The import of all our existing configuration happens automatically.
The www CNAME record alias should redirect to your GitHub pages URL. So we ensure that the DNS respond address of www.florianjosefreheis.com is always florianjosefreheis.github.io. I also set up two A records to the DNS servers of my domain host DNS servers.
Enforce HTTPs
After configuring CloudFlare DNS, we need to force all requests to use HTTPs. By clicking on the Crypto tab, we can change the SSL option to Full.
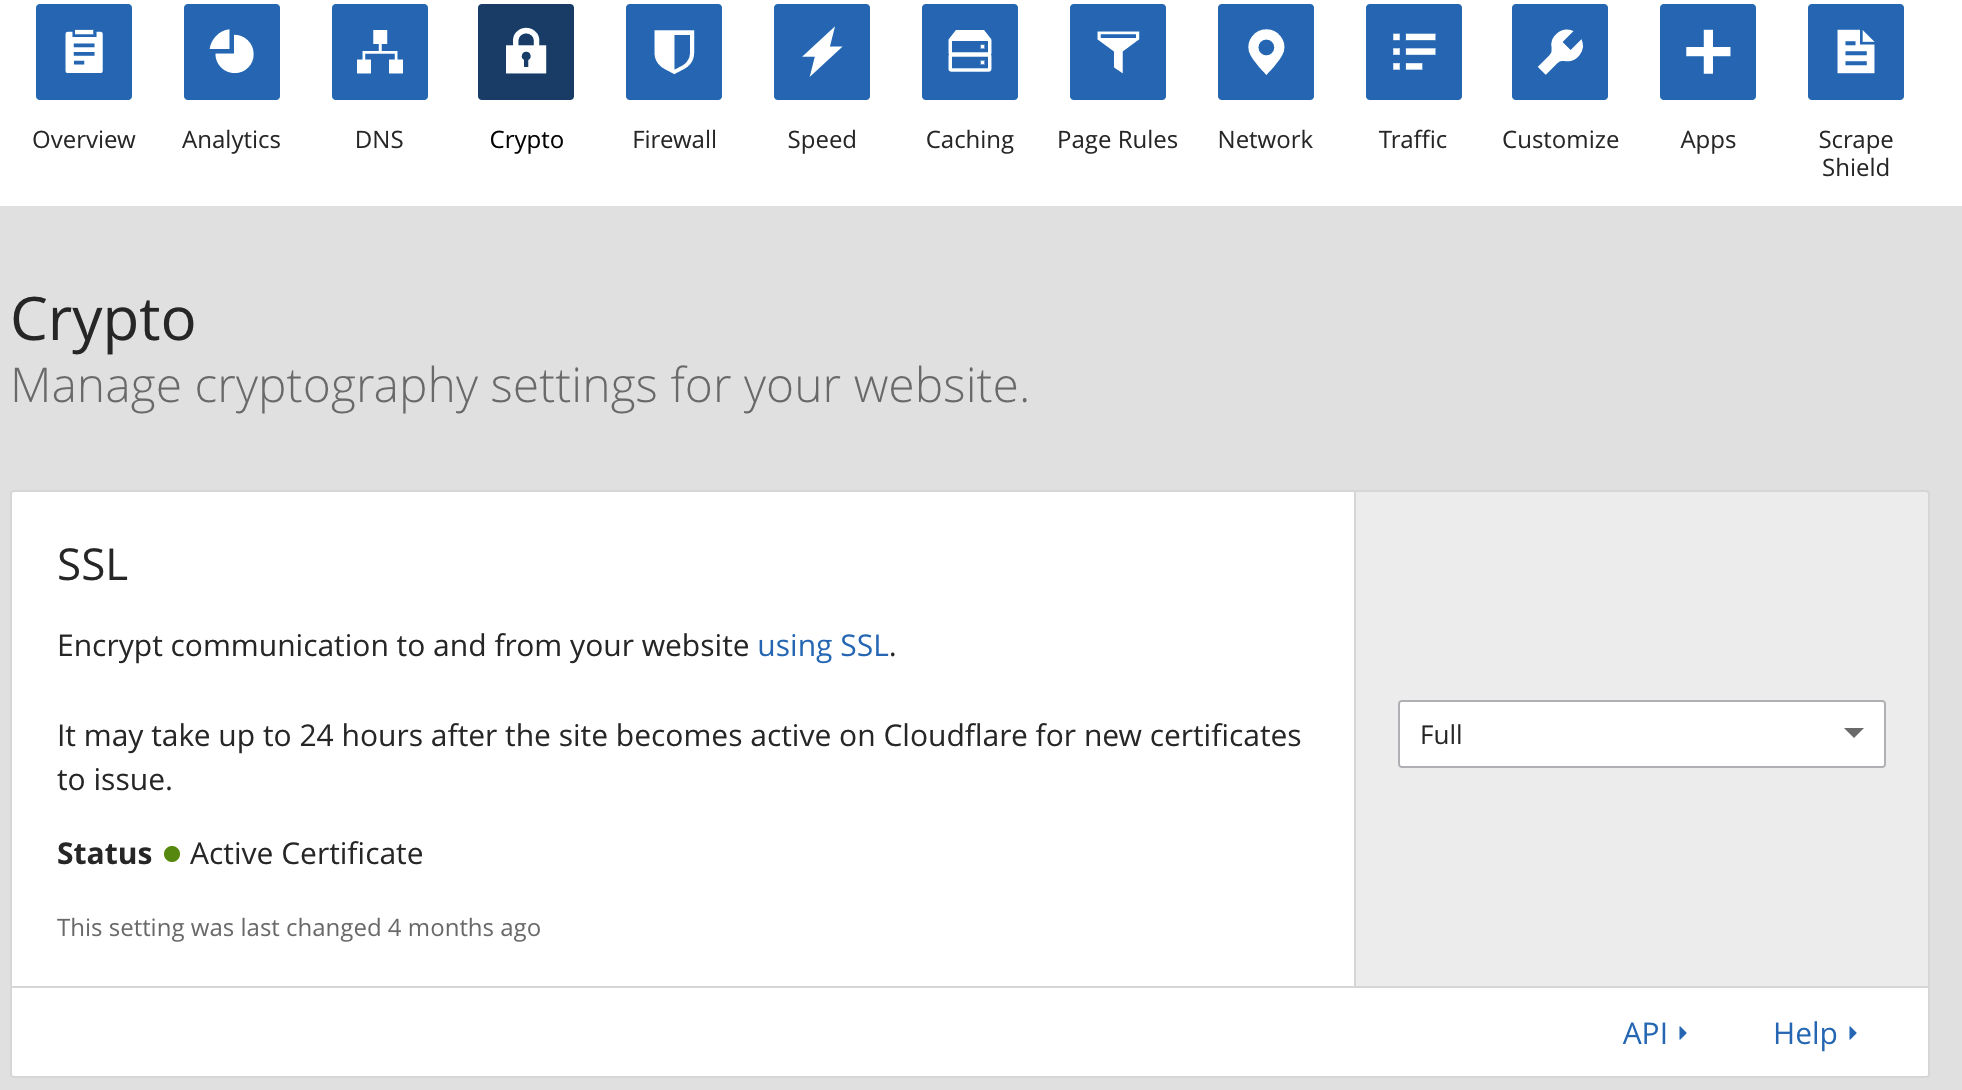
The full mode encrypts all communication streams, even behind CloudFlare servers. The hosting server always needs to supports SSL. By using GitHub we need to stay in a loose mode, as GitHub won’t validate the SSL certificate with a custom domain name.
Depending on the DNS propagation time of our domain provider (which could take up to 48 hours), our site is now served in HTTPs.
More infos can be found in this CloudFlare blog post.